llllloooooo

The official llllloooooo blog

Tuesday, May 23, 2023

Lenovo Laptop cannot charge even with AC power connected

 I recently experienced a problem where my Lenovo P51 laptop would not charge even when the AC adapter was connected. Not only did the little battery icon in Windows not show the charging lightning bolt, but the charging LED next to the power port would not light up.

If I shutdown the unit using a "hard" shutdown (Hold "Shift" while selecting "Shut down") then the power charging LED light would come on and my laptop would begin charging. However when I logged back in to Windows, the LED would turn off and the unit wouldn't charge anymore.

Note that while the login screen was displaying the unit would keep charging, it was only after I logged in that the unit stopped charging.

I tried all of the usually suggested steps including

- Going into "Device Manager", uninstalling all the "Battery" related drivers and rebooting.

- Going into "System Configuration" and disabling every startup service and rebooting (i.e. performing a "clean" boot)

The problem was that I was using "Airplane Mode" on my laptop to force it to use the hard ethernet connection rather than the Wifi. In addition to this in the "Lenovo Vantage" app, under the "Power" settings, "Airplane Power Mode" was enabled.

What I *think* was happening is that Lenovo Vantage somehow thought that if my laptop was in "Airplane Mode" then it shouldn't allow the unit to charge up.

I fixed the problem by disabling the "Airplane Power Mode" setting in the "Lenovo Vantage" app. I guess it could also be fixed by turning off "Airplane Mode" as well.

I sincerely hope this information solves this issue for someone else and saves them from the hours of troubleshooting that I had to go through.

Sunday, January 3, 2021

Adding an Ethernet bridge interface on Raspberry Pi 4 under Debian Buster based Raspberry Pi OS

I am in the process of trying to get QEMU working on a Raspberry Pi 4 running the most recent (December 2020) version of Raspberry Pi OS (aka Raspbian) which is based on Debian Buster.

In order for QEMU networking to work, one needs to have a bridge style interface on the host system. A Bridge is a virtual interface that allows multiple other interfaces to connect to it and exchange information. The idea in QEMU is that when QEMU is started up, QEMU can be configured to create a virtual TAP interface which connects to a bridge interface on the host system. In turn, one of the physical interfaces on the host system is also connected to the bridge. This allows the TAP interface and the physical interface to communicate, which in turn allows the QEMU guest to access the "real" network.

This only typically works with hard wired RJ-45 style ethernet interfaces, normally the eth0 interface. Wireless interfaces (wlan0) don't cope very well in this situation because wireless networks don't cope very well with clients transmitting packets from multiple source MAC addresses. (I won't go into the details. I couldn't be bothered.)

There are a few guides on the internet describing how to add a bridge interface to a Raspberry Pi but most of these are very out of date. They refer to using the /etc/network/interfaces file which is no longer used (by default) in modern Raspberry Pi OS.

The old way of configuring bridge interfaces on a Raspberry Pi.

The steps in the following guide are based loosely on the notes seen in an article called

Setting up a Raspberry Pi as a bridged wireless access point
https://www.raspberrypi.org/documentation/configuration/wireless/access-point-bridged.md

However this article focuses on creating a wireless bridge which isn't what we want to do, so the following steps provide a filtered guide to just creating a hard Ethernet based bridge and leaving the wireless interface alone. Perform all of these steps as root or with the "sudo" command.

1) On the Raspberry Pi network interfaces are created by the systemd network daemon (systemd-networkd). Create a file called /etc/systemd/network/bridge-br0.netdev with the following contents. 

[NetDev]
Name=br0
Kind=bridge

This will configure systemd-networkd to create a bridge interface called br0.

2) Create a file called /etc/systemd/network/br0-member-eth0.network with the following content

[Match]
Name=eth0

[Network]
Bridge=br0

This configures systemd-networkd to add the eth0 interface to the bridge called br0

3) Enable the systemd network daemon with the following shell command. Note that this command will enable the daemon even across reboots.

# systemctl enable systemd-networkd

4) IP and IPv6 addressing is handled by the dhcpcd daemon. To configure the IP properties of the new br0 bridge interface we add the following lines to the bottom of the file /etc/dhcpcd.conf . Note, comment out any other active configuration for eth0 if there is any.

# Don't get a DHCP lease on eth0
# because it's part of a bridge now
denyinterfaces eth0

# Get a lease on br0
interface br0

Note also that there are other parameters you can configure on behalf of br0. Do a search on "man dhcpd.conf" for other available parameters.

Optional extra step) Install the bridge-utils package to get the legacy (but still very useful) brctl command. The brctl command is superseded by the "ip link" set of commands but brctl is easier to use and more informative in my view.

# apt-get install bridge-utils
Finally reboot your system, make sure your RJ45 ethernet is plugged in, and confirm that there is now a bridge interface (br0) active. 

Here are some sample command outputs from my system showing that while the wireless interface is still active as normal, the Ethernet interface now shows no IP address but the br0 interface has managed to obtain an IP address for the copper network instead.

root@raspberrypi:~#brctl show
bridge name     bridge id               STP enabled     interfaces
br0             8000.dca632000007       no              eth0

root@raspberrypi:~#ip link show master br0
2: eth0: <BROADCAST,MULTICAST,UP,LOWER_UP> mtu 1500 qdisc mq master br0 state UP mode DEFAULT group default qlen 1000
    link/ether dc:a6:32:00:00:07 brd ff:ff:ff:ff:ff:ff

root@raspberrypi:~#ip addr show
1: lo: <LOOPBACK,UP,LOWER_UP> mtu 65536 qdisc noqueue state UNKNOWN group default qlen 1000
    link/loopback 00:00:00:00:00:00 brd 00:00:00:00:00:00
    inet 127.0.0.1/8 scope host lo
       valid_lft forever preferred_lft forever
    inet6 ::1/128 scope host
       valid_lft forever preferred_lft forever
2: eth0: <BROADCAST,MULTICAST,UP,LOWER_UP> mtu 1500 qdisc mq master br0 state UP group default qlen 1000
    link/ether dc:a6:32:00:00:07 brd ff:ff:ff:ff:ff:ff
    inet6 fe80::dea6:32ff:fe00:0007/64 scope link
       valid_lft forever preferred_lft forever
3: br0: <BROADCAST,MULTICAST,UP,LOWER_UP> mtu 1500 qdisc noqueue state UP group default qlen 1000
    link/ether dc:a6:32:00:00:07 brd ff:ff:ff:ff:ff:ff
    inet 10.99.99.220/24 brd 10.99.99.255 scope global dynamic noprefixroute br0
       valid_lft 83444sec preferred_lft 72644sec
    inet6 2001:0db8:aaaa:bbbb:88c:c220:218:50fe/64 scope global dynamic mngtmpaddr noprefixroute
       valid_lft 2591992sec preferred_lft 604792sec
    inet6 fe80::19d1:b0a3:d764:45b5/64 scope link
       valid_lft forever preferred_lft forever
4: wlan0: <BROADCAST,MULTICAST,UP,LOWER_UP> mtu 1500 qdisc pfifo_fast state UP group default qlen 1000
    link/ether dc:a6:32:00:00:09 brd ff:ff:ff:ff:ff:ff
    inet 10.99.99.79/24 brd 10.99.99.255 scope global dynamic noprefixroute wlan0
       valid_lft 100853sec preferred_lft 148253sec
    inet6 2001:0db8:aaaa:bbbb:ab7e:fa07:5ee4:4298/64 scope global dynamic mngtmpaddr noprefixroute
       valid_lft 2591121sec preferred_lft 603921sec
    inet6 fe80::7b77:6ad9:cfbe:dcfd/64 scope link
       valid_lft forever preferred_lft forever

root@raspberrypi:~#ifconfig
br0: flags=4163<UP,BROADCAST,RUNNING,MULTICAST>  mtu 1500
        inet 10.99.99.220  netmask 255.255.255.0  broadcast 10.99.99.255
        inet6 2001:0db8:aaaa:bbbb:88c:c220:218:50fe  prefixlen 64  scopeid 0x0<global>
        inet6 fe80::19d1:b0a3:d764:45b5  prefixlen 64  scopeid 0x20<link>
        ether dc:a6:32:00:00:07  txqueuelen 1000  (Ethernet)
        RX packets 10802  bytes 1365340 (1.3 MiB)
        RX errors 0  dropped 0  overruns 0  frame 0
        TX packets 1208  bytes 138128 (134.8 KiB)
        TX errors 0  dropped 0 overruns 0  carrier 0  collisions 0

eth0: flags=4163<UP,BROADCAST,RUNNING,MULTICAST>  mtu 1500
        inet6 fe80::dea6:32ff:fe00:0007  prefixlen 64  scopeid 0x20<link>
        ether dc:a6:32:00:00:07  txqueuelen 1000  (Ethernet)
        RX packets 17786  bytes 3658451 (3.4 MiB)
        RX errors 0  dropped 0  overruns 0  frame 0
        TX packets 1243  bytes 142024 (138.6 KiB)
        TX errors 0  dropped 0 overruns 0  carrier 0  collisions 0

lo: flags=73<UP,LOOPBACK,RUNNING>  mtu 65536
        inet 127.0.0.1  netmask 255.0.0.0
        inet6 ::1  prefixlen 128  scopeid 0x10<host>
        loop  txqueuelen 1000  (Local Loopback)
        RX packets 6  bytes 398 (398.0 B)
        RX errors 0  dropped 0  overruns 0  frame 0
        TX packets 6  bytes 398 (398.0 B)
        TX errors 0  dropped 0 overruns 0  carrier 0  collisions 0

wlan0: flags=4163<UP,BROADCAST,RUNNING,MULTICAST>  mtu 1500
        inet 10.99.99.79  netmask 255.255.255.0  broadcast 10.99.99.255
        inet6 fe80::7b77:6ad9:cfbe:dcfd  prefixlen 64  scopeid 0x20<link>
        inet6 2001:0db8:aaaa:bbbb:ab7e:fa07:5ee4:4298  prefixlen 64  scopeid 0x0<global>
        ether dc:a6:32:00:00:09  txqueuelen 1000  (Ethernet)
        RX packets 630  bytes 68111 (66.5 KiB)
        RX errors 0  dropped 0  overruns 0  frame 0
        TX packets 137  bytes 21081 (20.5 KiB)
        TX errors 0  dropped 0 overruns 0  carrier 0  collisions 0
I hope this helps someone. Please let me know if it does!

Thursday, December 3, 2020

You do not really understand something unless you can explain it to your grandmother

The quote in the title of this post should be the maxim of everyone who is trying to gain a technical understanding of anything.

There are a number of variants, and they're attributed to Albert Einstein, Richard Feynman, Lord Rutherford of Nelson and others. No one really knows who said it first but the concept is one that's been adopted by people striving for competence throughout the ages.

The key to this quote for me is the your grandmother part. Why does the quote use "your grandmother"? Why doesn't it say that you should be able to explain something to your next door neighbor, or your husband, or the mail man?

Is this quote trying to denigrate poor old granny? Is it trying to imply that your grandmother is the dumbest person you know, so if you can explain something to that thick old biddy then you can explain it to anyone? I don't think so.

I believe that "your grandmother" is perfect here for two reasons.

First, your grandmother is YOUR grandmother. She's genetically one of your closest relatives! That means it's likely that she probably has about the same natural intelligence as you do! Maybe her mind is a little withered thanks to her age, but it's unlikely that you would have an IQ of 200 and your second closest direct ancestor is a complete dullard!

The other thing is, that each generation tends to receive more and more education. So while your grandmother probably has about the same brain capacity as you do, she probably hasn't had as much training or experience in your chosen field as you.

Second, the other aspect that is unique to a loving, doting, caring grandma is that she's interested in everything you have to say. If you are lucky enough to have a grandmother like mine, you'll know that you're the most precious, wonderful and spoilable fellow or lass in the world to her. She always wants to hear what you've been doing, where you've been, and what you're thinking! She loves spending time with you and listening to you talk.

In essence the quote is saying "You should be able to explain something to someone who is about as smart as you are and hasn't had training in your field, but they're interested in what you have to say."

It's very difficult to explain something to someone who just isn't naturally intelligent enough to grasp it. It's even harder to explain something to someone who isn't interested in what you're saying.

For all those reasons I think that being able to explain something to Nan is the best way to know that you've understood it.

Wednesday, November 4, 2020

tcpdump displays oui Unknown when displaying Ethernet headers

When you run the popular lightweight packet sniffer tcpdump and you command it to display link layer or Ethernet headers by specifying the -e option you will most likely see a message saying oui Unknown as per the following example...

tcpdump -e -t -i eth0 udp port chargen
dc:a6:32:11:22:33 (oui Unknown) > 00:1c:58:33:22:11 (oui Unknown), ethertype IPv6 (0x86dd), length 63: fd55:5555:5555:5555:dea6:32ff:fe11:2233.33031 > fd55:5555:5555:5555::1.chargen: UDP, length 1

As I'm sure that anyone who is reading this knows, an Organizationally Unique Identifier (OUI) is a 3 byte code at the start of an Ethernet Address that is meant to identify the manufacturer of the device or Ethernet interface that the Ethernet Address belongs to.

By default tcpdump only recognizes a very, very small list of OUI codes that belong to very old equipment and so the chances are that when you run tcpdump -e you'll see the oui Unknown message displayed.

You can fix that by recompiling tcpdump to include a more up to date list of OUI codes with the help of a python script called make-oui.py which is available at

https://gist.githubusercontent.com/gvanem/1643c946fb2395b6c8a05c3ec8904e13/raw/620085609082829a0f5572ad2359b21df2c1b0f0/make-oui.py

This script downloads the latest version of the OUI codes. By default it also downloads a list of something called Enterprise Numbers which map certain numbers to equipment Manufacturer names. This Enterprise Numbers list only has relevance to tcpdump when you're decoding RADIUS packets or MPLS LSP Ping packets. I can see some people wanting to decode RADIUS packets but MPLS LSP Ping would be extremely rare except for in very sophisticated high end ISP or Enterprise networks.

I really need to stop procrastinating and implement MPLS in
my home network.

The way to get the script to work is to first download it to the directory containing the tcpdump source code. (I've tested this with tcpdump version 4.9.3). Naturally make sure the script is executable

# wget https://gist.githubusercontent.com/gvanem/1643c946fb2395b6c8a05c3ec8904e13/raw/620085609082829a0f5572ad2359b21df2c1b0f0/make-oui.py
# chmod +x make-oui.py

I suggest that you DO perform the next command but it is optional. If you perform the next step the tool will NOT download the Enterprise Numbers that I talked about. Just to reemphasize, you don't need these Enterprise Numbers if you just want to look at Ethernet OUI names. If you do skip the next step so that you can have tcpdump include Enterprise Numbers then the resultant binary executable is about 2M bigger than it would be otherwise!!

# echo "" > enterprise-numbers

Now run the script as follows

./make-oui.py 
Downloading oui-generated.txt from http://standards-oui.ieee.org/oui.txt 
Got 4488 kBytes (100%)
Wrote 28843 OUI records to oui-generated.c
A local enterprise-numbers already exist.
Appended 0 SMI records to oui-generated.c

This script has now generated a file called oui-generated.c which we can now use to replace the original oui.c file included in the tcpdump source code.

cp oui.c oui.c.orig
cp oui-generated.c oui.c

Finally build and install tcpdump as per normal (Remember to make sure libpcap is installed first). 

Note that the new oui.c file will generate some warning messages when it compiles as per the following. For some reason the make-oui.py tool adds some functions to oui.c that aren't actually used but they are harmless.

./oui.c: In function 'oui_val_to_name':
./oui.c:28883:25: warning: implicit declaration of function 'bsearch' [-Wimplicit-function-declaration]
28883 |   const struct tok *t = bsearch (&oui, oui_values, num, sizeof(oui_values[0]),
      |                         ^~~~~~~
./oui.c:28883:25: warning: initialization of 'const struct tok *' from 'int' makes pointer from integer without a cast [-Wint-conversion]
./oui.c: In function 'smi_val_to_name':
./oui.c:28891:25: warning: initialization of 'const struct tok *' from 'int' makes pointer from integer without a cast [-Wint-conversion]
28891 |   const struct tok *t = bsearch (&smi, smi_values, num, sizeof(smi_values[0]),

If you really want to get rid of those warnings then just edit the new oui.c file and remove all the lines at the bottom beginning with the one that says

/* Comparision routine needed by bsearch() routines.

If we re-run the new binary with the same input as the command shown at the top of this post, you'll see that I'm sending a packet from my Raspberry Pi to a Cisco router.

tcpdump -e -t -i eth0 udp port chargen
dc:a6:32:11:22:33 (oui Raspberry Pi Trading Ltd) > 00:1c:58:33:22:11 (oui Cisco Systems, Inc), ethertype IPv6 (0x86dd), length 63: fd55:5555:5555:5555:dea6:32ff:fe11:2233.33031 > fd55:5555:5555:5555::1.chargen: UDP, length 1

Note that the tcpdump binary executable that includes the up to date OUI list will be about 600kbytes larger than the normal tcpdump binary without the OUI list. If you decide that you want to include the Enterprise Numbers then add about another 2Mbytes to that. 

I'd love it if anyone out there has actually decoded a packet with tcpdump (i.e. an MPLS LSP Ping or RADIUS packet). Please let me know in the comments because you are very cool!

Monday, November 2, 2020

ifconfig in LFS doesn't display IPv6 information

The default version of ifconfig installed as part of Linux From Scratch doesn't work for IPv6. It doesn't display any ipv6 info as per the following output

# ifconfig -i eth0
eth0      Link encap:Ethernet  HWaddr D1:AA:42:11:22:33
          inet addr:10.1.2.3  Bcast:10.1.2.255  Mask:255.255.255.0
          UP BROADCAST RUNNING MULTICAST  MTU:1500  Metric:1
          RX packets:2062 errors:0 dropped:1 overruns:0 frame:0
          TX packets:237 errors:0 dropped:0 overruns:0 carrier:0
          collisions:0 txqueuelen:1000
          RX bytes:161416  TX bytes:77392

ifconfig -V
ifconfig (GNU inetutils) 1.9.4
Copyright (C) 2015 Free Software Foundation, Inc.
License GPLv3+: GNU GPL version 3 or later <http://gnu.org/licenses/gpl.html>.
This is free software: you are free to change and redistribute it.
There is NO WARRANTY, to the extent permitted by law.

Written by Marcus Brinkmann.

Note that there's no IPv6 address in the ifconfig command output? I know that IPv6 is working because I can use the new ip addr command from the "iproute2" suite to show me the active IPv6 addresses on the device. I can also ping6 to the local loopback interface address (::1) and I can ping6 from the device to a remote IPv6 address. 

You need to go ahead and install the version of ifconfig that comes with the net-tools suite as seen in Beyond LFS at

http://www.linuxfromscratch.org/blfs/view/svn/basicnet/net-tools.html

You'll probably have to install the net-tools suite any way to get the important command netstat which can be used to see what ports are open on your system.

When you go to follow the instructions to compile net-tools as seen at the link above DO NOT apply the remove_dups patch that they suggest. That will stop you from building the IPv6 capable version of ifconfig. It's up to you if you want to use the hostname tool from net-tools or keep the old one. I can't see much difference. Neither of them displays an IPv6 address. 

In addition when you run the "make config" command which asks you questions about what features you want, you must say no to the following features

DECnet protocol family (HAVE_AFDECnet)
STRIP (Metricom radio) support (HAVE_HWSTRIP)
Token ring (generic) support (HAVE_HWTR)

I admit, it is a little grating not to have DECnet or Token ring support but if I am magically transported back to 1987 I'll worry about it then. 

Back to the Future IV was all ready to film. It was about Marty needing
to go back to the past to get some DECnet drivers to install on his modern
day Linux system. For some reason the movie couldn't secure financing.

After building net-tools I backed up the original inetutils version of the ifconfig and hostname executables and deleted the old inetutils version of the ifconfig man page. I used the following commands as root

cp /bin/hostname /bin/hostname.inetutils
cp /sbin/ifconfig /sbin/ifconfig.inetutils
rm /usr/share/man/man1/ifconfig.1

Finally I ran make install to install the newer and better versions of both tools. It works beautifully now as per the output below (Note that the command syntax is a little different, but not significantly)

ifconfig eth0
eth0: flags=4163<UP,BROADCAST,RUNNING,MULTICAST>  mtu 1500  metric 1
        inet 10.1.2.3  netmask 255.255.255.0  broadcast 10.1.2.255
        inet6 fe80::d3aa:42ff:fe11:2233  prefixlen 64  scopeid 0x20<link>
        inet6 200a:111b:222c:333d:d3aa:42ff:fe11:2233  prefixlen 64  scopeid 0x0<global>
        ether d1:aa:42:11:22:33  txqueuelen 1000  (Ethernet)
        RX packets 2184  bytes 171492 (167.4 KiB)
        RX errors 0  dropped 1  overruns 0  frame 0
        TX packets 254  bytes 78754 (76.9 KiB)
        TX errors 0  dropped 0 overruns 0  carrier 0  collisions 0

# ifconfig -V

net-tools 1.60

ifconfig 1.42 (2001-04-13)

P.S. If you really do want DECnet support then you can try to install libdnet as seen at 

http://libdnet.sourceforge.net/

Note that it hasn't been updated since 2005 so I have no idea if it will work or not. 

As for Token Ring and STRIP support.....if you actually manage to get one of those WORKING, and I mean not just compiled but PHYSICALLY WORKING BETWEEN DEVICES using a Raspberry Pi then I will send you MONEY to tell me what hardware and setup you are using because that would be AWESOME!!

Token Ring was obviously superior to Ethernet. The world would
have been a better place if Token Ring won the LAN wars.

Getting IPv6 services working with xinetd on LFS

This is another post in the series of my trying to get Linux From Scratch working on a Raspberry Pi to my satisfaction.

If you are an IPv6 obsessive like me then you won't accept any tool or service that does not natively and easily support IPv6. xinetd doesn't really make it easy and obvious how to enable small services for IPv6 but it can probably be forgiven since development seems to have finished on it in about 2007. This post is the list of steps I went through to get xinetd working and working with IPv6.

xinetd is a more modern and secure replacement for the older inetd tool which can be used to start many small old school services such as telnet / echo / discard / chargen / daytime / systat etc. These are the kinds of tools that you can enable on a cisco router using the command "service tcp-small-servers" .

Even though the Linux From Scratch manuals do not encourage installing inetd or xinetd I still think it's useful to have these cool little services available. Anyone who knows about these tools already knows that they are not encrypted or secure. For that reason it makes sense to only make them available on your local trusted network segments. 

I managed to compile xinetd on the raspberry pi by first installing the tirpc library as per the instructions at

http://www.linuxfromscratch.org/blfs/downloads/stable/BLFS-BOOK-10.0-nochunks.html#libtirpc

Then I slightly modified the installed libtirpc include files so that they looked like the "old" rpc include files that xinetd depends on by using the following shell commands. This is required so that xinetd compiles rpc tools nicely.

# First change to the directory where the original 
#rpc include files (netdb.h) are
cd /usr/include/rpc

# Next move them all to the tirpc include directory
mv netdb.h ../tirpc/rpc

# Delete the old rpc directory and link it to the 
# more modern tirpc version
cd /usr/include
rm -rf rpc
ln -sfv tirpc/rpc rpc

To obtain xinetd follow the instructions as seen in an older version of Beyond LFS as seen at

http://www.linuxfromscratch.org/blfs/view/7.7/server/xinetd.html

And download the source gz file from

ftp://anduin.linuxfromscratch.org/BLFS/svn/x/xinetd-2.3.15.tar.gz

Decompress and compile as per the instructions seen in the link above but before you type "make" run the following command to tell the build to use the newly installed tirpc libraries.

export LDFLAGS="-ltirpc"

Now to IPv6. The secret is that you have to use the largely undocumented xinetd configuration file attribute v6only . This attribute isn't even mentioned in the xinetd.conf man page and good luck finding details on your favorite search engine. The only reason I knew about it was the thread I've linked below that talks about others trying to get IPv6 working with xinetd services

* xinetd doesn't listen on IPv6 by default
https://bugzilla.redhat.com/show_bug.cgi?id=195265

If you try to do this without using the secret v6only attribute then you might end up with error messages in your log file (/var/log/daemon.log on my system) that look something like

xinetd[123]: bind failed (Address already in use (errno = 98)). service = chargen-stream-v6
xinetd[123]: Service chargen-stream-v6 failed to start and is deactivated.

Basically what you have to do is when you define a service in your xinetd.conf files is to specify it twice. First the IPv4 version and then the IPv6 version. For example, for tcp chargen (port 19) I have the following in my config file

# IPv4 version of tcp chargen
service chargen
{
        disable         = no
        type            = internal
        id              = chargen-stream
        socket_type     = stream
        protocol        = tcp
        user            = root
        wait            = no
        flags           = IPV4
}

# IPv6 version of tcp chargen
service chargen
{
        disable         = no
        type            = internal
        id              = chargen-stream-v6
        socket_type     = stream
        protocol        = tcp
        user            = root
        wait            = no
        flags           = IPV6
        v6only          = yes
}


Technically you don't need the "flags = IPV4" statement in the first paragraph because xinetd will only create an IPv4 socket anyway even if you leave this statement out, but including this attribute makes the paragraphs a lot clearer in describing what they are doing.

So assuming you have xinetd services working for IPv4 you should be able to get them working for IPv6 by just copying each paragraph, changing the "id" slightly to make it unique, and then adding the "flags = IPV6" and "v6only = yes" attributes.

Good luck!

Sunday, October 4, 2020

Kinetic Valium - Fidget Spinner

I want to officially document my inventing of the term "Kinetic Valium" which applies to my Fidget Spinner. If you have any kind of anxiety then cast aside your sense of self pride and dignity and get one of these.

Note the ink stains. A pen leaked in the same pocket as my fidget spinner.
I still wear those pants.

For me, the fidget spinner helps the most when you're stuck somewhere with absolutely nothing to do or to entertain you. I don't care about the weird looks I get from other adults when I'm playing with a "childrens" toy. I feel like the day I'm considered a "normal" person by other adults is the day that I've failed as a human being.

Smoking also alleviates boredom and anxiety but it
is not as cool as using a fidget spinner.

I've recently become a fidget spinning master. I can now spin the device both clockwise and anti-clockwise!! (Well, only in my left hand...I guess after a few more months of practice I'll be able to do it with my right as well but I'll have to quit my job first to make time.) 

Fidget spinners can also help with weight loss. Studies show that using a fidget spinner continuously for even as short a time as 17 hours a day can lead to a loss of up to 1 kg of fat per decade! With this kind of intense flow of power one can imagine a clean energy future where fidget spinners are connected directly to the electricity grid to replace fossil fuels, nuclear power and out of date solar generation. 

When you think about it a wind turbine is just a less efficient
and less reliable form of fidget spinner.

Note : You can also use the term "Kinetic Benzodiazepine" . This avoids any copyright issues.

Sunday, September 13, 2020

"Multiple definition" error when compiling with GCC 10 and above. Inetutils WITHOUT "--disable-servers"

In the spirit of the rare and unusual error messages that I occasionally post on this blog that no one but me will probably ever experience, this post is about the "multiple definition" error message that occurs when you try to compile inetutils 1.9.4 with GCC 10. This error will probably occur with a whole heap of other oldish software as well so even if you're not compiling "inetutils" but you are using GCC 10 or later, this might apply to you if you get the "multiple definition" error.

The error is of the form

/sources/inetutils-1.9.4/telnetd/state.c:69: multiple definition of `not42'; utility.o:/sources/inetutils-1.9.4/telnetd/utility.c:66: first defined here

and also

/sources/inetutils-1.9.4/ftpd/extern.h:93: multiple definition of `errcatch'; ftpcmd.o:/sources/inetutils-1.9.4/ftpd/extern.h:93: first defined here

The problem is that going from GCC 9 and below to GCC 10 and above the default GCC behavior changed. If multiple definitions of the same global variable are made without using the extern keyword, GCC 10 will generate an error message. GCC 9 and below would just treat all of these kinds of global variable definitions as the same variable and not complain. Specifically the default in GCC has changed from "-fcommon" to "-fno-common".

There's a neat explanation at

https://wiki.gentoo.org/wiki/Gcc_10_porting_notes/fno_common


The following solutions work for inetutils. You only have to chose one of them. I used the first one.

1) Specify the "-fcommon" flag when using GCC to compile inetutils. In other words add "-fcommon" to the CFLAGS. I did this by appending 

CFLAGS="-O2 -g -fcommon" 

to the end of the "configure" command I was using during the compilation process.

2) You can specify the "--disable-servers" flag when you run "configure". This gets rid of the affected code and the compilation will succeed but it means that you won't have cool old school services like telnet, echo and discard.

3) Fix the code. You can fix the code by making small modifications to 3 files. These modifications add the "extern" keyword to some of the global variables that need fixing. See the following URL for a suggested patch

http://git.yoctoproject.org/cgit.cgi/poky/diff/meta/recipes-connectivity/inetutils/inetutils/0001-ftpd-telnetd-Fix-multiple-definitions-of-errcatch-an.patch?id2=0e09f045738259c49126a792cdf583f335bb29e8


The background here is that I was trying to work my way through "Linux From Scratch" (LFS) as seen at http://www.linuxfromscratch.org/ . LFS lets you go through the experience of creating and compiling the whole GNU/Linux system from bare bones source code. I got to the part where "inetutils" was being compiled and it failed as seen above. Inetutils gives you useful network tools like "ping" and "traceroute" so it's impossible to completely skip.

If you use the standard LFS configuration for inetutils then you won't run into any problems but I wasn't happy with the default. I noticed that the suggested configuration for inetutils in LFS was to include the configure option "--disable-servers". This means that inetutils would not include some of those useful old school services like "telnet" and "echo" which I still wanted to be available.

The documentation says that LFS excludes these services because they are insecure however I disagree. I think that if used properly, while keeping in mind that these services are indeed susceptible to packet sniffing, they're invaluable for basic network troubleshooting at a local network level. Obviously you're going to prefer to use something encrypted like SSH rather than unencrypted telnet when your packets are travelling over an untrusted network.

So when I didn't include "--disable-servers" as part of the configure step I got the compilation error message as seen above.

I'm sad that the maintainers of inetutils haven't updated it to reflect this change in the GCC 10 compiler, but given that the last release of inetutils was in 1995 (v1.9.4) I don't expect anyone cares too much. 

I hope this helps someone! I'd really love to know in the comments if anyone else has come across this problem while going through Linux From Scratch.

Friday, March 27, 2020

Tried OPNsense to replace old cisco router. Failed

I have been using a second hand Cisco 3800 series router running very old IOS software as my home gateway for the last few years. It's been very reliable and always performed extremely well. Apparently this model can switch almost 500,000 packets per second (with no other features configured) so it was always more than adequate for my needs.

Unfortunately it was very loud and took a lot of power to run, and since Cisco stopped providing updates for this model of router years ago I decided to look elsewhere for something a bit less bulky, a bit quieter, and a bit more modern.

It weighs as much as one of my children and it sounds like a jet engine
when you turn it on.
Naturally I wanted to be trendy and use an open source product! I wanted the power of being able to customize and control what my router was doing and not have to worry about my router secretly sending "troubleshooting data" (wink wink) back to the manufacturer.

Although I'm not a complete amateur when it comes to this sort of thing (I use OpenWRT on my access points and most of the little devices in my house run some kind of pre-hacked linux) I didn't want to build something from the ground up. I wanted some kind of "integrated" system that let me get things up and running and go from there.

I considered a few alternatives including OpenWRT, DD-WRT, pfSense, ipFire and others. All of these have a nice web based gui and lots of useful "add ons" and "plugins" that allow you to perform a great deal of customization.

I eventually settled on OPNSense which is based on the FreeBSD operating system.

I've never had much to do with the FreeBSD operating system before so I was a little hesitant, but after hearing about how strong and powerful the FreeBSD networking stack was meant to be, I decided to go with it. I was particularly convinced by a smart looking guy called George Neville-Neil who mentioned that the FreeBSD networking stack is what's being used by the Mars Pathfinder mission to communicate with Earth!!

George has written textbooks, spoken at conferences, has a cool beard and his
code is on a space ship....he's everything I want to be. 

Now for the exciting part of the post. The bit where things went wrong and I tell you why I failed. There are two reasons why OPNsense didn't work for me.

1) OPNSense is nothing like Cisco IOS

When I say this I don't mean "The commands weren't the same" (which is true). I mean that Cisco IOS is a truly integrated routing system where each part of the router software knows about all the other parts whereas OPNSense is nothing like that. In addition the commands and tools on a Cisco router generally follow a consistent style and pattern whereas each plugin in OPNsense is a kingdom unto itself.

OPNSense is essentially a shell that fits atop dozens of different programs that don't natively know anything about each other and were probably not written with many of the other programs in mind. This applies equally to other open source style routing systems like OpenWRT and pfSense. DD-WRT seems to be better integrated than its cousins, but consequently it has far less functionality and ability for customization.

In most cases this is fine because if you run a standard combination of services, then they'll have been tested adequately with each other and the OPNSense system can successfully integrate their functionalities together. However, if you stray off the beaten path a little, then that's when you run into trouble.

For example, in my network I need to route multicast traffic. It took me over a week to get it working with OPNsense and this is why. In some circumstances the OPNsense firewall component (pf) is programmed to transmit routed multicast traffic with an INCORRECT DESTINATION MAC ADDRESS WHICH MAKES IT ABSOLUTELY BLOODY USELESS (See OPNsense issue 3629). It seems like the maintainers of this part of the code has absolutely no plans to fix this issue.

This picture isn't here for any reason. I love
everybody and I am at peace with the universe.
I suspect that it isn't being fixed because multicast routing is quite rare in home networks and isn't necessarily super common in enterprise networks either so why would the maintainers spend time fixing this problem?

I came across about a dozen other feature interaction issues like this one. Most of them were trivial but a few were very tedious to overcome indeed.

Now I'm not saying that products made by big proprietary network vendors don't have problems, especially when weird combinations of features are used but I can guarantee that if something like multicast routing wasn't working then it would be fixed very very quickly.


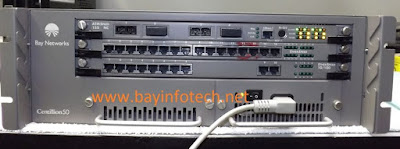
I actually know a guy who worked for the now defunct Bay Networks router company.
You wouldn't believe some of the bugs he found!
2) FreeBSD is the OS/2 of the modern open source world

Are you old enough to remember OS/2? One of my professors introduced me to it back when Microsoft Windows was pretty much completely dominant in desktop computing.

It was great! It performed better and more reliably than Windows did, and it even ran (some) Windows applications! It's nowhere to be seen now.


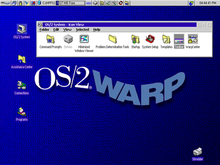
If it's made by IBM then how can you go wrong?

The issue I had with it was that in those rare instances where I had a problem with OS/2, there was every possibility that I was the first and only human being on the planet to have experienced that particular issue because the user base of OS/2 wasn't what you'd call "vast".

And even though there were hundreds of brilliant people on forums and mailing lists who could probably help me, I was a "newb" and my requests for help weren't looked upon with much respect.

FreeBSD has kind of the same problem. Even though there are some very appealing aspects of FreeBSD, such as the package and ports system, and the extensive documentation of the base operating system, getting help isn't always easy. That seems to be because the user base is numerically much less than that of Linux, but also the FreeBSD user base all seem to be universally brilliant people who aren't always interested in helping "newbs".

These people aren't worthy to smell an experienced FreeBSD user's dirty socks!!
Now obviously there are also many arrogant people that maintain Linux features and core components as well, but since there are always plenty of new users being drawn in to the linuxverse, there's always someone out there willing to help, and likely many others who have had, or are having, the same problem as you!

Linus Torvalds, the creator of Linux, is widely acknowledged to be one of
the kindest 
and most patient men in the world.
What will I do?
To anyone who says I didn't give OPNsense enough of a chance, I actually ran it as my home's main gateway for a whole month as I tried to incrementally enable features I needed and troubleshot problems. I eventually had to give up after weeks of my OPNsense system's Ethernet interface randomly losing it's link about once every 36 hours.

I promise I did extensive troubleshooting. I replaced cables, moved switch ports and went through a large permutation of settings, driver updates and debugging but I could find no sign of why the problem was happening or what to do to fix it.

All of that being said, seeing how OPNsense works has given me some great insight into the tools that open source routing and firewall systems use. For that I am grateful.

I basically plan now to run a very basic linux system as my gateway (maybe on a Raspberry Pi?) but without a unifying Gui/web interface sitting above all the tools. I plan to just use the individual base programs like ipfw, dnsmasq and quagga and take control of the interactions between them myself.

Obviously this won't be as pretty as using a nicely integrated GUI but you have to admit, it will be very hardcore!


You know this guy edits his firewall config files with "vi" instead of "nano".
I will probably fail and go back to using my old hulk of a Cisco router, or buying a second hand TP-link router and installing OpenWRT on it, but I'm sure I'll learn a lot on the way. I think that's what my main goal is anyway.

Sunday, January 12, 2020

VirtualBox not passing 802.1q VLAN tags to or from guests with Broadcom NetXtreme 57xx Gigabit Ethernet on Windows 10 Host

I have a Dell Latitude E5500 laptop running Windows 10 Home Edition (Version 1909) which has a Broadcom NetXtreme 57xx Gigabit Controller Integrated Ethernet port (Driver version 214.0.0.0 by Microsoft)

I tried to setup a Linux Guest Virtual Machine (OpenWRT but I think this applies to all guests) using Oracle VirtualBox (Version 6.1) . I wanted my guest to access the real world network so I used the "Bridged Adapter" setting in the Network Properties of the guest and bridged the guest to my Broadcom Gigabit Ethernet Interface. Note that I changed the "Promiscuous Mode" setting from the default of "Deny" to "Allow All" in order to let my guest see a wider range of frames.

Guest Network Settings in VirtualBox

This worked fine for normal non tagged networking but when I wanted my guest to use 802.1q VLAN tagging, the tagged frames didn't seem to get to or from the guest's tagged interfaces.

Note that I did not have any kind of 802.1q VLAN tagging enabled on the host Windows device. I suppose another approach to this problem would have been to create separate VLAN tagged interfaces on the host and bridge them individually to the guest, but I honestly couldn't figure out how to do that. I think Windows 10 Home has some kind of in built impediment to using VLANs and 802.1q tagging.

To get 802.1q VLAN tags to pass to the guest I had to follow the instructions as seen in a few other sites that tackle a similar problem where the WireShark sniffer software running on Windows doesn't display VLAN tags when sniffing on this kind of network interface. For example

Wireshark VLAN Capture Setup
https://wiki.wireshark.org/CaptureSetup/VLAN

LiveAction - Don't Lose the Tags
https://mypeek.liveaction.com/tip.php?id=21

The instructions basically boil down to adding a special Windows Registry Key value as follows.

* Run the Windows Registry Editor regedit on the Windows 10 host. (Windows Key + R , then open regedit)

* In the Registry Editor search under the folder HKEY_LOCAL_MACHINE\SYSTEM\CurrentControlSet\Control\Class for a value called TxCoalescingTicks . This will take you to the registry folder corresponding to your Broadcom GigE adapter where you need to perform the next steps. Note that we only want to find the folder that is under CurrentControlSet. Ignore folders that are NOT under CurrentControlSet. Also note that in some circumstances there might be more than one folder under the CurrentControlSet to have that TxCoalescingTicks value (multiple adapters installed?). Try to determine which one of them corresponds to your network card.

* The folder you've discovered should have a name along the lines of

Computer\HKEY_LOCAL_MACHINE\SYSTEM\CurrentControlSet\Control\Class\{xxxxxxxx-xxxx-xxxx-xxxx-xxxxxxxxxxxx}\00xx

where xx just means some hexadecimal number unique to your system.

*  Add a new String Value to the folder you'd discovered with name PreserveVlanInfoInRxPacket and set the value to 1. After adding this value to the folder it should look something like this

Newly created PreserveVlanInfoInRxPacket Value added to folder
After disabling and then re-enabling the host's Broadcom GigE network interface in Control Panel (which you could just do by rebooting the host) and stopping and restarting the guest in VirtualBox, I found that my guest was then able to receive and transmit tagged 802.1q frames as expected.

From what I can tell these instructions might also work with other types of Broadcom brand GigabitEthernet controllers being used on Windows 10 hosts. 

I guess based on the name of the PreserveVlanInfoInRxPacket value being added, the problem was that the Windows driver was removing 802.1q VLAN tags on frames to and from the guest. This meant that the guest was receiving everything on its native untagged VLAN, and when it transmitted a tagged frame it was being output as untagged on the host's physical GigE interface.

I also want to note that for my guest I had to change the default VirtualBox Guest Networking setting of Promiscuous Mode to All to get things working. This means that the guest is able to tell its virtual networking adapter to listen to all frames rather than just the ones directed to it. I don't know if that's required in all cases though.

Tuesday, March 13, 2018

My message of hope to the people of the world


Here is a message of hope and reconciliation to all the people of the world ....


Lettuce Leaf in Peas ... Let us live in peace

I thank you for your support and prayers as I dedicate my life to spreading this important message to all mankind.

Friday, December 1, 2017

Convert binary data files between Big Endian and Little Endian with xxd

Here is a nifty command line trick you can use to convert binary data files between big endian and little endian format. So for example if you are using 4 byte / 32 bit words, byte swapping 0x1a2b3c4d to 0x4d3c2b1a.

"input.bin" is your input binary file.
"temp.txt" is an intermediate file that you can delete later.
"output.bin" is the output binary with all the 4 byte / 32 bit words endian swapped.

xxd -e -g4 input.bin temp.txt
xxd -r temp.txt output.bin

or if you want to skip using the temporary text file...

xxd -e -g4 input.bin | xxd -r > output.bin


The xxd tool is used to make a hexdump or convert a hexdump back into binary.

The xxd tool normally comes as part of the "vim" application, so if xxd isn't available on your system you might need to install vim. Additionally I don't think this will work with the busybox version of xxd found on embedded system because as far as I can see it doesn't currently support all the required command line options. The standard linux / BSD / unix version of xxd should be fine.

Note that this procedure does not convert executables between big endian and little endian, only binary data.

For example. Say I have a binary file "test.bin" as follows
 
00000000  41 42 43 44 45 46 47 48  49 4a 4b 4c 4d 4e 4f 50

00000010  51 52 53 54 55 56 57 58  59 5a 30 31 32 33 34 35
00000020  36 37 38 39 61 62 63 64  65 66 67 68 69 6a 6b 0a

First use "xxd -e -g4" to convert the binary file to a hexdump text file. The "-e" option says to use Little Endian output format. Use this option regardless of whether you're converting from Big to Little or Little to Big Endian. The "-g4" option specifies to use 4 bytes (32 bits) per word. You can use a different word size option with "-g".

xxd -e -g4 test.bin temp-hexdump.txt

The contents of temp-hexdump.txt are as follows

#cat temp-hexdump.txt
00000000: 44434241 48474645 4c4b4a49 504f4e4d  ABCDEFGHIJKLMNOP
00000010: 54535251 58575655 31305a59 35343332  QRSTUVWXYZ012345
00000020: 39383736 64636261 68676665 0a6b6a69  6789abcdefghijk.


Note that the 4 byte hex values in the middle are presented in little endian format (i.e. reversed) so for the first word instead of "41 42 43 44" we have "44 43 42 41".

Finally we use "xxd -r" convert this hexdump back to binary format. Note that xxd -r only looks at the numerical hex data so if you want to edit your text file, just edit the hex numbers not the strings at the right.

xxd -r temp-hexdump.txt test-new-endian.bin

The contents of the output file test-new-endian.bin are endian swapped from the original as follows

00000000  44 43 42 41 48 47 46 45  4c 4b 4a 49 50 4f 4e 4d
00000010  54 53 52 51 58 57 56 55  31 30 5a 59 35 34 33 32
00000020  39 38 37 36 64 63 62 61  68 67 66 65 0a 6b 6a 69


Finally note that if your input binary file size isn't a multiple of the chosen word size, such as 32 bits / 4 bytes, then the last couple of bytes in the file will be discarded. One thing you could do is manually edit the temporary hexdump text file in the middle of the process add some zeros to the hex data at the end to make your data have a whole number of words before executing "xxd -r".

I used this method as a basis to convert an "md" memory dump from the u-boot boot loader utility from one endian into another on my debian linux system. Obviously there are ways you can programmatically do this with python scripts and so forth but I always prefer using existing command line tools if possible.
 

Sunday, March 12, 2017

Trance Techno - Sound of Goodbye by Armin van Buuren - About depression and suicide??

One of the many techno tunes that I love to listen to repeatedly is Armin van Buuren's catchy and hip "Sound of Goodbye".

This is a pretty good approximation of what I look like
at one of the many "raves", "techno soirees" and "trance shindigs"
I attend.

Here is a youtube link to the so called "Tribal Feel Edit" of the song which has a very "trancey" feel but there are other versions of "Sound of Goodbye" out there to suit everyone's taste in techno.

Her Majesty prefers the "Dubstep" style. 

In the clip the vocals are performed by the Dutch trance icon Elles de Graaf . You'll also see the quite fetching Ms de Graaf running half naked across an isolated green valley towards a lake where at the end of the clip she appears to drown herself.

You get to see her bottom just before she dies!!

The lyrics are as follows. I've numbered each of the lines. She doesn't actually sing the numbers they're just there for reference purposes later.

     1. Every face I see is cold as ice
     2. Everything I touch is pain
     3. Ever since I lost imagination
     4. Like a stream that flows into the sea
     5. I am lost for all eternity
     6. Ever since you took your love away from me

     (Repeat lines 7 & 8 till the end of the song......)
     7. Sometimes the sound of goodbye
     8. Is louder than any drumbeat


The first two lines of the lyrics tell us that this poor damsel can't stand human contact any more and that everything is giving her pain. I think this describes the experience of extreme unipolar clinical depression poetically and precisely. The social withdrawal, the feeling that no one loves or cares for you, and that the only emotions you can experience are negative ones.

The third line talks about "lost imagination" being the trigger for her misery. Could it be some important relationship that she thought she had with someone that turned out to be imaginary, like a love that ended up not being reciprocated, or a friendship that wasn't as strong as she thought. One other possibility is that she has lost her faith in God. The God that she once thought was real but was actually only "imagination".

Depression can often be triggered by some kind of heartbreak or painful emotional event. I think this is what has sent the lovely Elles into her spiral of unhappiness.

I'll be your friend Elles! Come and stay at my house!
My wife won't mind. She can take the kids and go and live 
with her parents for a few weeks.

Lines 4 and 5 talk about how she feels like water from a stream that gets lost in the sea. That is, she thinks that her life doesn't matter and in the grand scheme of things she is insignificant and means nothing. Again this is the typical thought pattern of someone who is severely depressed.

Line 6 talks about the trigger for her illness again. "Ever since you took your love away from me". Again, I think this implies a failed relationship or a lost faith. The experience of rejection by person or God is, I believe, one of the worst things that a sensitive maiden such as Juffrouw de Graaf can endure and is something that could definitely be the spark for the psychological inferno of major depression.

"Juffrouw" is Dutch for "Missus". Google told me.

Now on to the "chorus". Lines 7 and 8 say that the sound of goodbye, which I think clearly refers to the act of killing yourself, is "Louder than any drumbeat".

The meaning of "drumbeat" here is pretty ambiguous. My first guess is that it might be a metaphor for her heartbeat which is in turn a symbol for her being alive. If this is what it's saying then the chorus means that she thinks that her suicide is more significant and matters more (louder) than her life.

The other alternative revolves around the idea that beating drums were used as a form of communication in some ancient cultures. Is she saying that she's tried to communicate with others about her pain and distress but that no one has listened, but that by drowning herself she'll finally get others to pay attention?

Ancient cultures also used smoke signals to communicate but
everyone thought "drumbeat" sounded cooler.

After all that detailed analysis I think it's quite reasonable and safe to assume that this song is indeed about the thoughts and emotions of a depressed woman who is going to die by her own hand. 

At this point in the post I think I'm supposed to appeal to anyone with depression or thoughts about suicide to contact a doctor or psychiatrist or something. Especially if you're an attractive techno princess with the voice of an angel.

 Just take some Prozac and get some shock treatment and
you'll be fine.


Thursday, June 7, 2012

All other jokes are dwarfed in comparison.

I have made up one "joke" in my lifetime, and I thought I should put it here so that future generations can look back in amazement. And without further ado, here it is....


What did Snow White say when she dropped off her negatives at the photo store?

"Some day my prints will come!"

Oh...I get it! Prints...like Prince....ha ha ha ha. It's a shame I
don't know what a camera is.

Thank you ladies and gentlemen.


Sunday, October 16, 2011

Freemake Video Converter : Easy DVD to DVD, DVD to movie file, movie file to DVD etc etc etc tool

I found a fantastic and easy tool for copying copy protected DVDs to movie files for easy viewing on your PC or mobile gizmo. It's Freemake Video Converter. It's so simple to use and it has a number of great features.

* Copy protected DVD to DVD, AVI, Flash, MP4, MP3 (Audio) and others.
* All of the above video formats to each of the other ones.
* The ability to crop and join source video files for rudimentary video editing.
* Free!!


One tip is that when I converted a few DVDs to AVI and MP4 I used the XVid Video codec rather than the default H.264 codec. It was faster to convert the videos and the output video played a lot smoother. My short research indicates that while H.264 is superior in quality to XVid, it takes a whole lot more CPU power to generate and to play. Maybe my PC isn't beefy enough to play it because whenever I used H.264 the picture was quite jerky whereas it's smooth with XVid.

Tuesday, July 14, 2009

Fantastic Noodles

I'm trying to find the right combination of spices and beef stock to make the perfect Fantastic Noodles. I'm going to log all my attempts here.

1) 85g Beef Fantastic Noodles + 1 Massel Beef stock cube + Dried vegetable sachel + 4 small sakes of Masterfoods Powdered Cheyenne Pepper. Did not use included beef soup satchel. : Only a very mild beef flavor. Tastes a bit oilier than with the included beef flavoring sachel. Also might be a bit too spicy for my tastes. Tomorrow I'll try two Massel beef stock cubes.

Update : I didn't bother continuing with this experiment. I've gotten sick of noodles and I don't eat them any more. To be honest I don't know what I ever saw in them.

Wednesday, May 6, 2009

Recovered my mother's corrupt NTFS harddrive

I just wanted to make a note of the tools I used to recover my mother's Windows XP NTFS harddrive that had a corrupted partition table. I will list the tools I used in order that I invoked them and some brief notes about each. I'm not going to list all the details because there are other sites with extensive details on how to use these tools. Besides, your hard drive crash will be different to mine.

To summarise I replaced the old hard drive with a new one that was at least three times as big as the old one and installed windows on it. I then added the busted hard drive to my system by disconnecting the CD drive and moving the cabling from the CD player to the old drive. I booted with my USB key running a linux live CD and used the "gddrescue" tool to create a raw disk image of the busted hard disk and saved it on the new disk. From there I removed the busted disk, reconnected the CD drive then booted up windows and used the tools below to extract information from the disk image.

Now the details.

First piece of advice. As soon as you detect that your hard disk is broken STOP USING IT. You need to plan what you'll do to recover the data and then do that. Don't just go poking around because you might only get one chance to recover the data. That is, your corrupted hard disk now has a limited lifetime and you don't want to waste time running "dir" repeatedly in the vain hope that it will do something.

Second, you'll need to get a new working hard drive that is at least three times as big as the original. This is because you're going to create a disk image of the old drive, copy that disk image and then retrieve files off the disk image.

Third, don't put the drive in a freezer like some people suggest. It will just mean that the drive will get condensation on it and get further damaged. By all means keep it cool while running with a heat sink or fan but don't freeze it.

1) Trinity Rescue Linux Live CD or Knoppix : Make a bootable CD or USB key using trinity rescue linux to boot up a linux system that can be used to recover your busted NTFS hard disk. Knoppix is ok too but doens't natively contain gddrescue which is listed below. I used a USB key because in order to install the old hard disk in the system I disconnected the CD drive and moved all it's connectors over to the broken harddrive. (I don't have any spare cabling)

2) ddrescue / gddrescue : Not to be confused with "dd" or "dd_rescue" this is a linux tool that can be used to create a disk image. The idea here is you point the tool at your busted harddisk and save an image of the disk to the new working disk. The advantage of gddresuce / ddrescue over "dd" and "dd_rescue" is that gddrescue will quickly build a disk image out of the readable parts of your busted hard disk first and then it will grind over the non working bits to see what it can retrieve. After this make a copy of the disk image because we're going to muck around with it. If you mess up the copy then you can delete it and make another copy of the original. I found that copying this file in Windows was much quicker than in linux. Note that this part of the process can take hours and hours (Took about 12 hours for a 20G drive for me)

All the tools from this point can be run from Windows. Some also work in Linux too.

3) testdisk : Use this to potentially reconstruct the partition tables and NTFS MFT on the disk image you created with gddresuce. This didn't work in my case but it might work for you. Then you can mount the disk image and just copy your files out of it. (VDK does this for windows. In linux you can just use )

4) photorec : If testdisk couldn't get the disk image mountable then use photorec to try to find file signatures and pull files out of the image. When this tool works it pulls files out that have well known file formats (jpg, doc, pdf etc) but it isn't able to retrieve the proper file names or directories. Huge note : In photorec you have the option of only retrieving files of a certain type and ignoring useless stuff like .exe or .dll files. Don't do this! Let the tool retrieve everything. I tried limiting the tool to .jpg and .doc and it only got about 2% of my files back. By letting it retrieve everything it was somehow able to get a lot more .doc and .jpg files. I just deleted all the files I didn't want later.

5) PhotoRec sorter from Builtbackwards : This tool takes the files generated by photorec and puts them into directories based on file type. So one directory for jpg, another for doc, another for pdf etc. Doing this makes sorting through the thousands of files much more convinient and you can just delete directories with unuseful files (like .dll or .exe)

All the tools below have other equivalent software that perform the same functions. I just picked ones that were freeware and worked in Windows.

6) Anti-Twin : This tool finds duplicate files and deletes or moves them. Photorec seems to generate a lot of duplicates. I imagine this is because the way it works is it looks at the raw contents of the disk and pulls files out. I guess the windows operating system must sometimes end up storing multiple copies of the same file in different places. You probably aren't interested in duplicates so use this tool to find and get rid of duplicates. I found that about 20% of the files retrieved by photorec were duplicates.

7) Mihov EXIF renamer : This took takes EXIF information embedded inside a jpeg created by a camera and tries to rename the jpg file accordingly. Generally this means naming it with the date and time it was taken. One major drawback of this tool is that it creates a copy of the files it renames instead of just renaming them. This is tedious because if you have files with and without EXIF information there's no easy way of telling which ones were succesfully copied and which ones were not. Maybe there's a better tool out there.


So now I'm going to present my mother's recovered files on Mother's day. I think she'll be very happy.

Update : I found a better EXIF based renamer called Namexif 1.5. It renames files with EXIF data and leaves the others alone which is perfect for what I want.

In addition I found that with photorec another problem I was having was that I was selecting the wrong "Partition Table Type". The program automatically selected "NONE" but I was using "Intel". I think it's best to use whatever the program automatically selects. Same goes for testdisk.